

If you've ever struggled to insert an invisible zip neatly, you're certainly not alone. Janet Moville of The Modern Approach Sewing School has kindly shared her tried-and-tested method with the Crafty Exchange community.
Drawing on decades of experience as a dressmaker, tailor and sewing tutor, Janet breaks the process down into clear, manageable steps to help you achieve a beautifully professional finish every time.
We're incredibly grateful to Janet for allowing us to feature this method and showcase the expertise of one of our wonderful directory suppliers.

Easy Invisible Zip Insertion by Janet Moville
Illustrated by Liz Rugman
Invisible zips are a wonderful invention and with a little know-how, are incredibly simple to insert.
After years of teaching invisible zip insertion, I believe I now have a foolproof method to share with you! Follow the step by step guide and illustrations and see how easy it is!
1 - Working from the wrong side, mark the starting position, along the seam-line; 2 cm (3/4") down from the top edge for garments with waistbands and nearer to 2.5 cm (1") for dresses, where lining and under-stitching is involved. Measure down from this position the length of the zip, to the bottom stop - less 3 cm (1¼”) and mark.
2 - Machine-baste through both layers, taking a 15 mm (5/8”) seam allowance, down to this mark, then secure with a locking stitch or a backstitch, finishing the remainder of the seam with smaller stitches. Press the seam - flat to embed the stitch, then open.
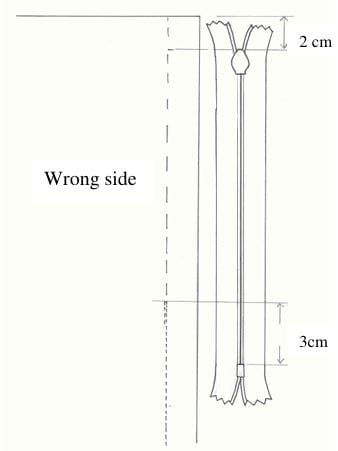
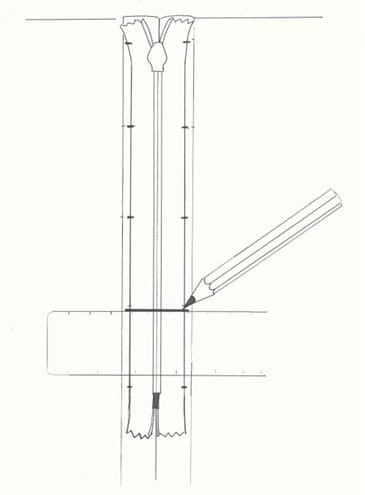
3 - Lay the zip face down, on top of the seam allowances, placing the top of the zip tab at the marked position.
Draw horizontal guidelines, using a cloth marking pencil, along the zip and across to the seam allowance.
I usually space these around 7.5 cm (3”) apart.
Remove basting.
The pressed fold line becomes a guide for the zip coil placement.
4 - Lay open zip face down on seam allowance, matching guidelines and making sure that the zip coil touches.
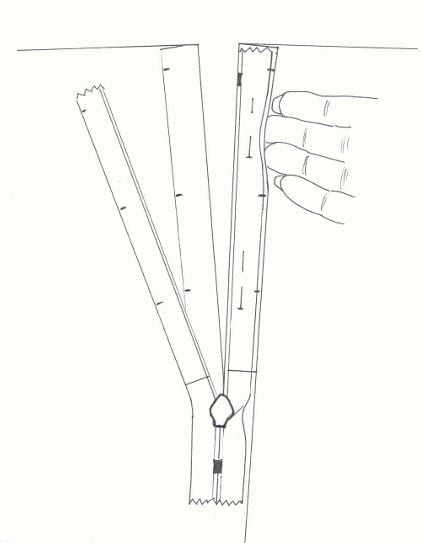
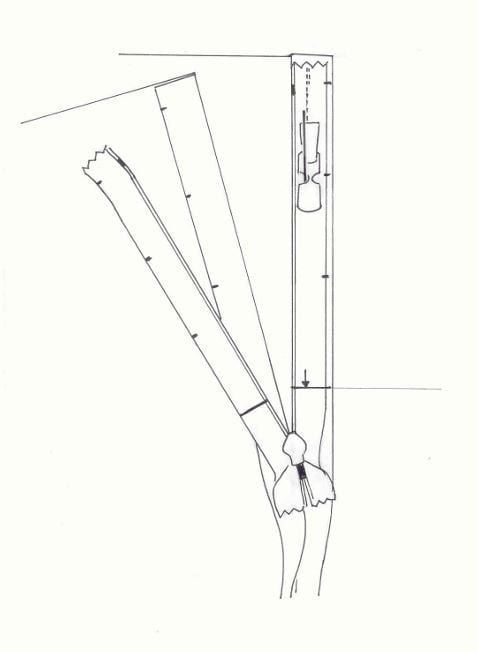
5 - Pin zip to seam allowance only in this position (one layer!)
Set stitch length to 3.5-4.0
Sew down centre of zip tape from top down, stopping on line with small stitches.
6 - Repeat for other side.
Tip: If you are sewing the left hand side of the garment, the needle will need to be on the left hand side of the zipper foot.
Remember that you are only sewing the zip tape to the seam allowances – no stitches should show on the face side!
7 - Sew down a second time using a shorter stitch length, this time holding zip coil flat so that the stitch falls close to the zip coil.
You may need to move the needle position to get close enough. If you are using an invisible zipper foot, make sure the needle is in the central position of the foot, as you use the left hand groove for the left hand side of the garment and vice versa.
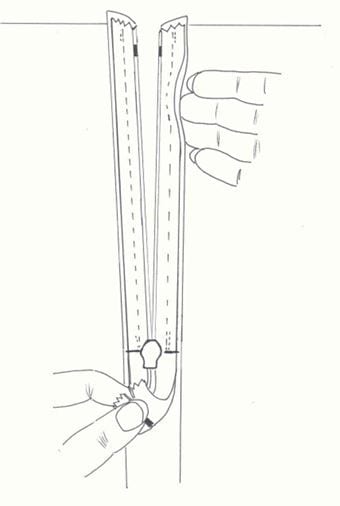
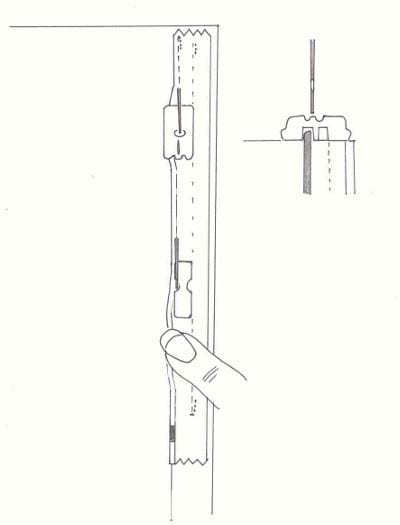
Again, stop where the small stitches meet so that the gap is closed. Sew one side of the zip tape to the seam allowance at the bottom edge.
8 - You will find that you’re able to sew right down to the smaller stitches because it is now possible to open the zip beyond the last inch, with the zipper tab out of the way. This means there is no need to sew that awkward little gap at the end.
Give it a try and see what you think!
The original article can be found on Janet's website, including a downloadable PDF.
Find out more about Janet and her wonderful sewing courses and workshops here: The Modern Approach Sewing School